👩🎓Managing Delegates
Adding, removing & renaming existing delegates is a simple task. Let's start by adding a delegate to an existing Smart Margin account.
Adding a New Delegate:
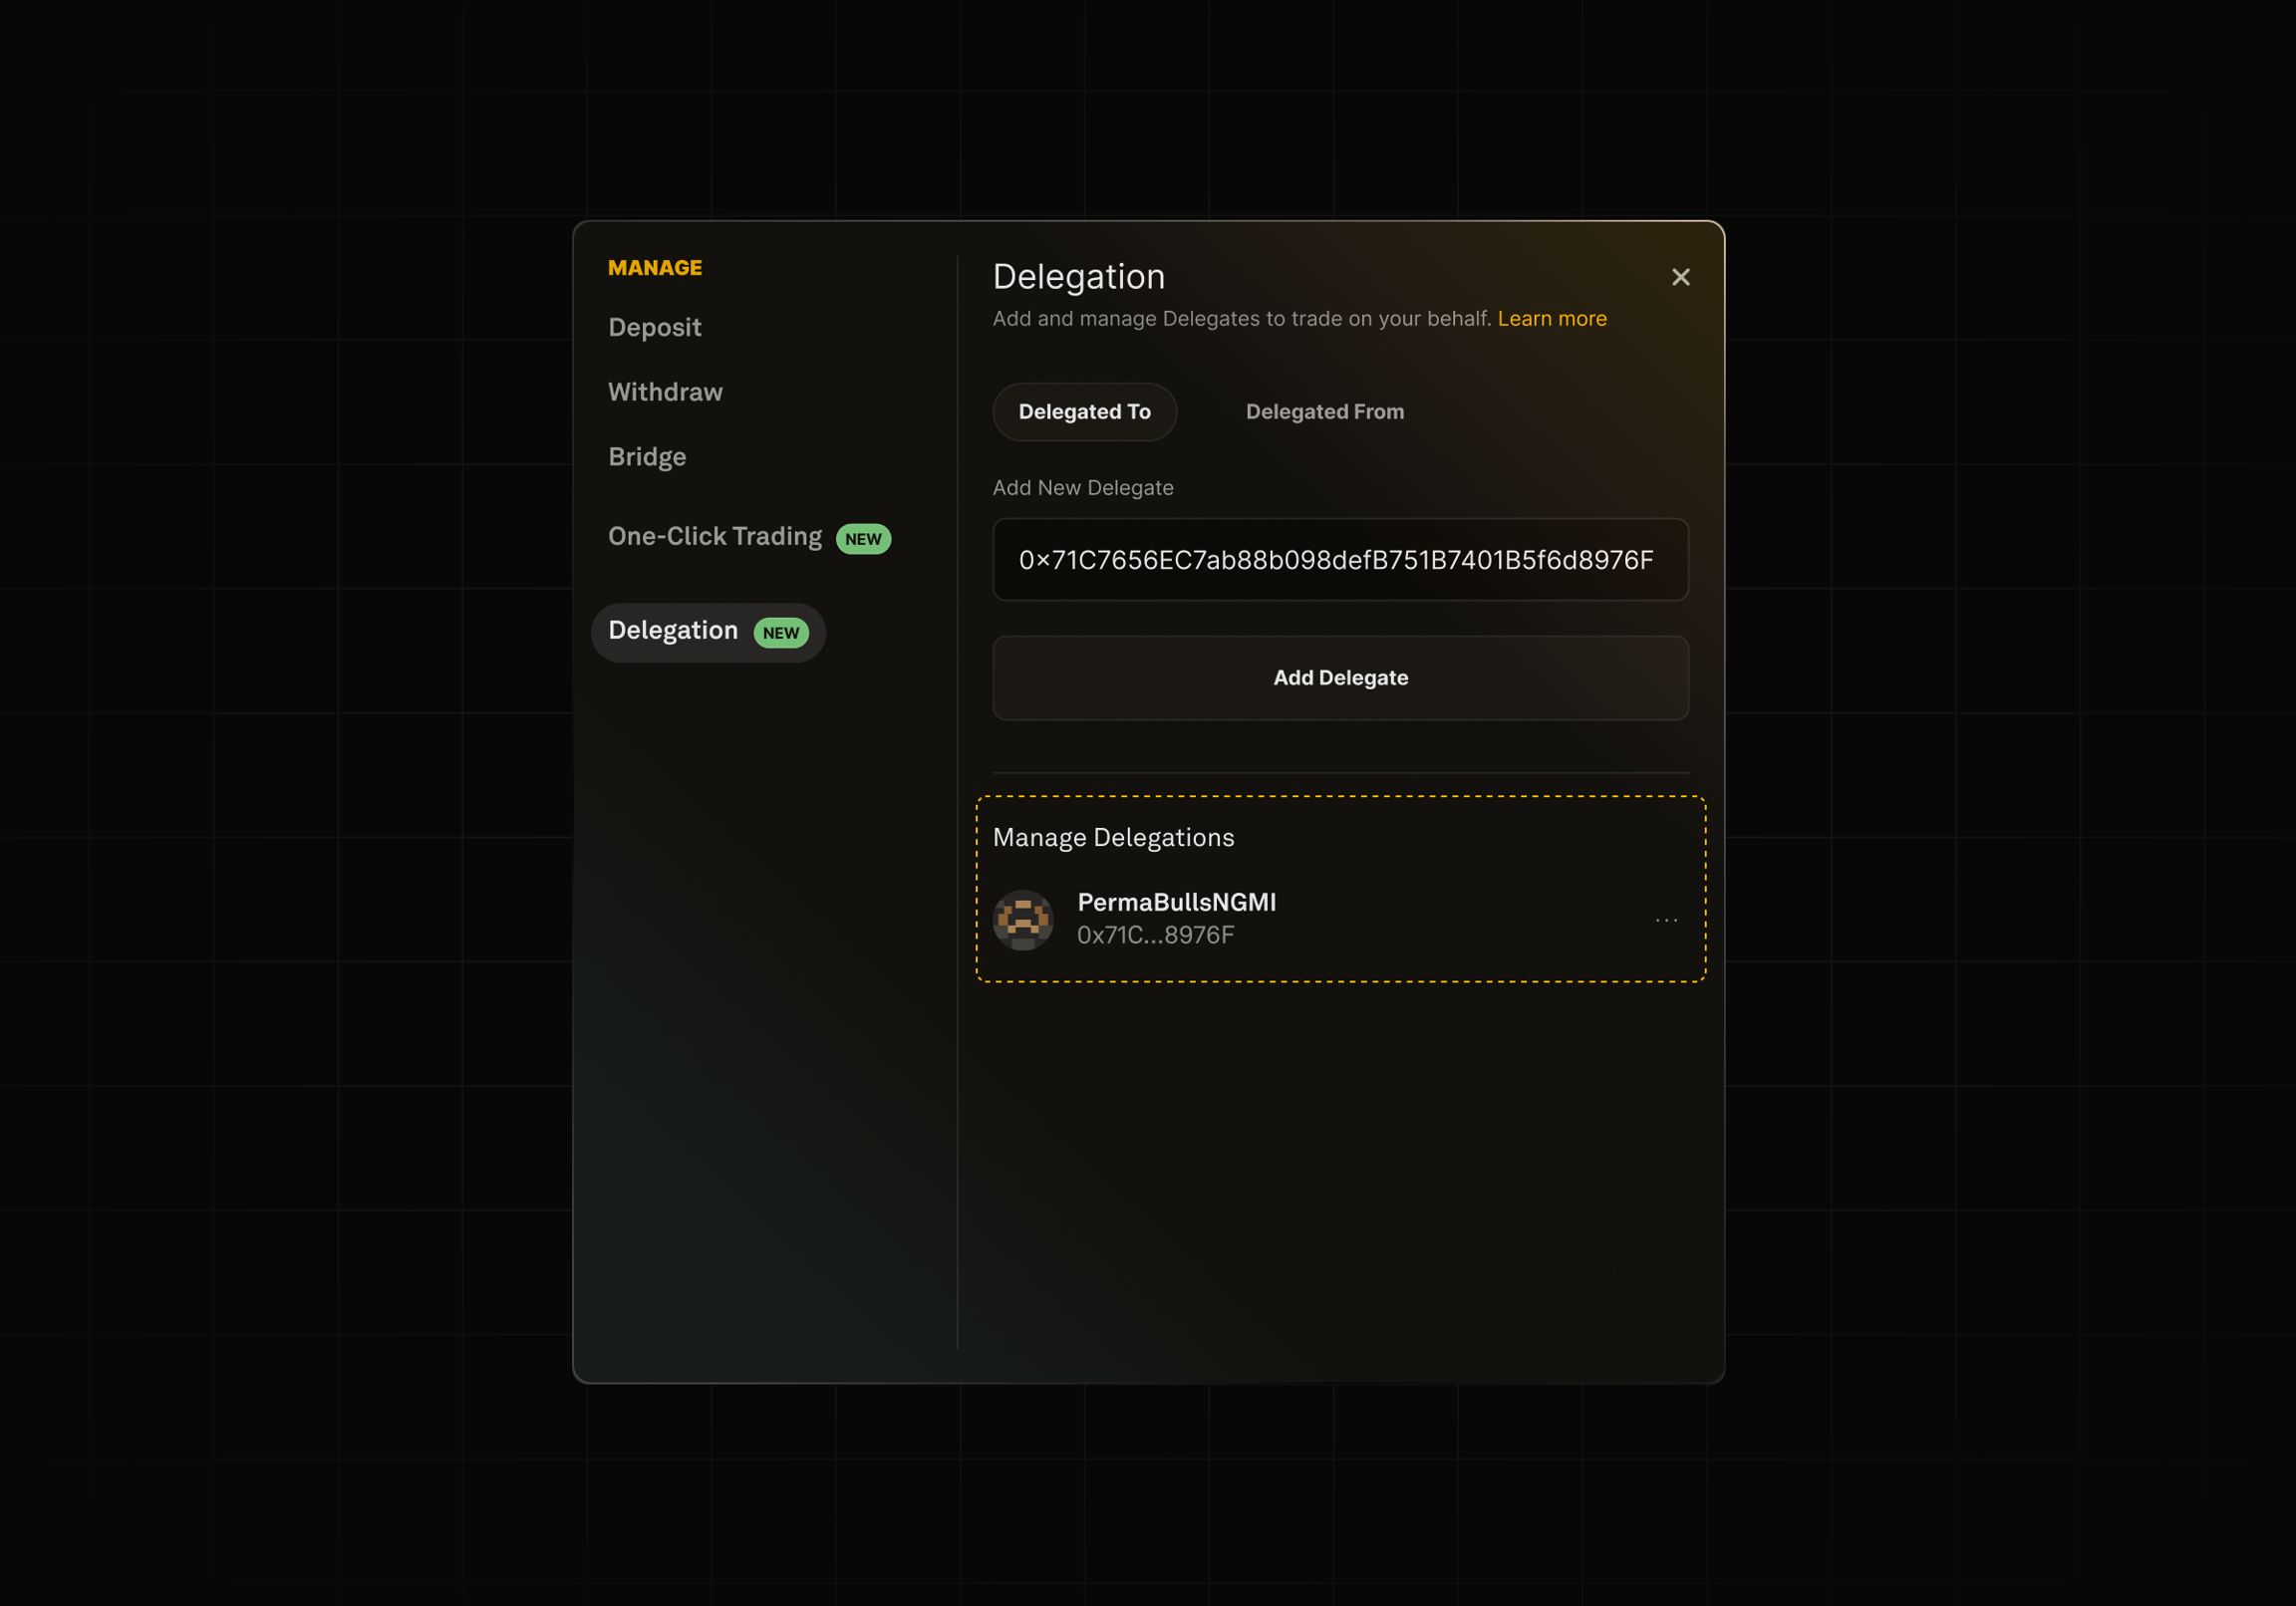
Step 1: In the manage modal in the Delegation section, you'll find two sub-tabs, Delegated To & Delegated From. Select Delegated To, and in the input field, enter the wallet address you want to delegate trade rights to; once a wallet address has been entered, push through the onchain transaction.
ENS names are an accepted input and will automatically convert to its resolver address

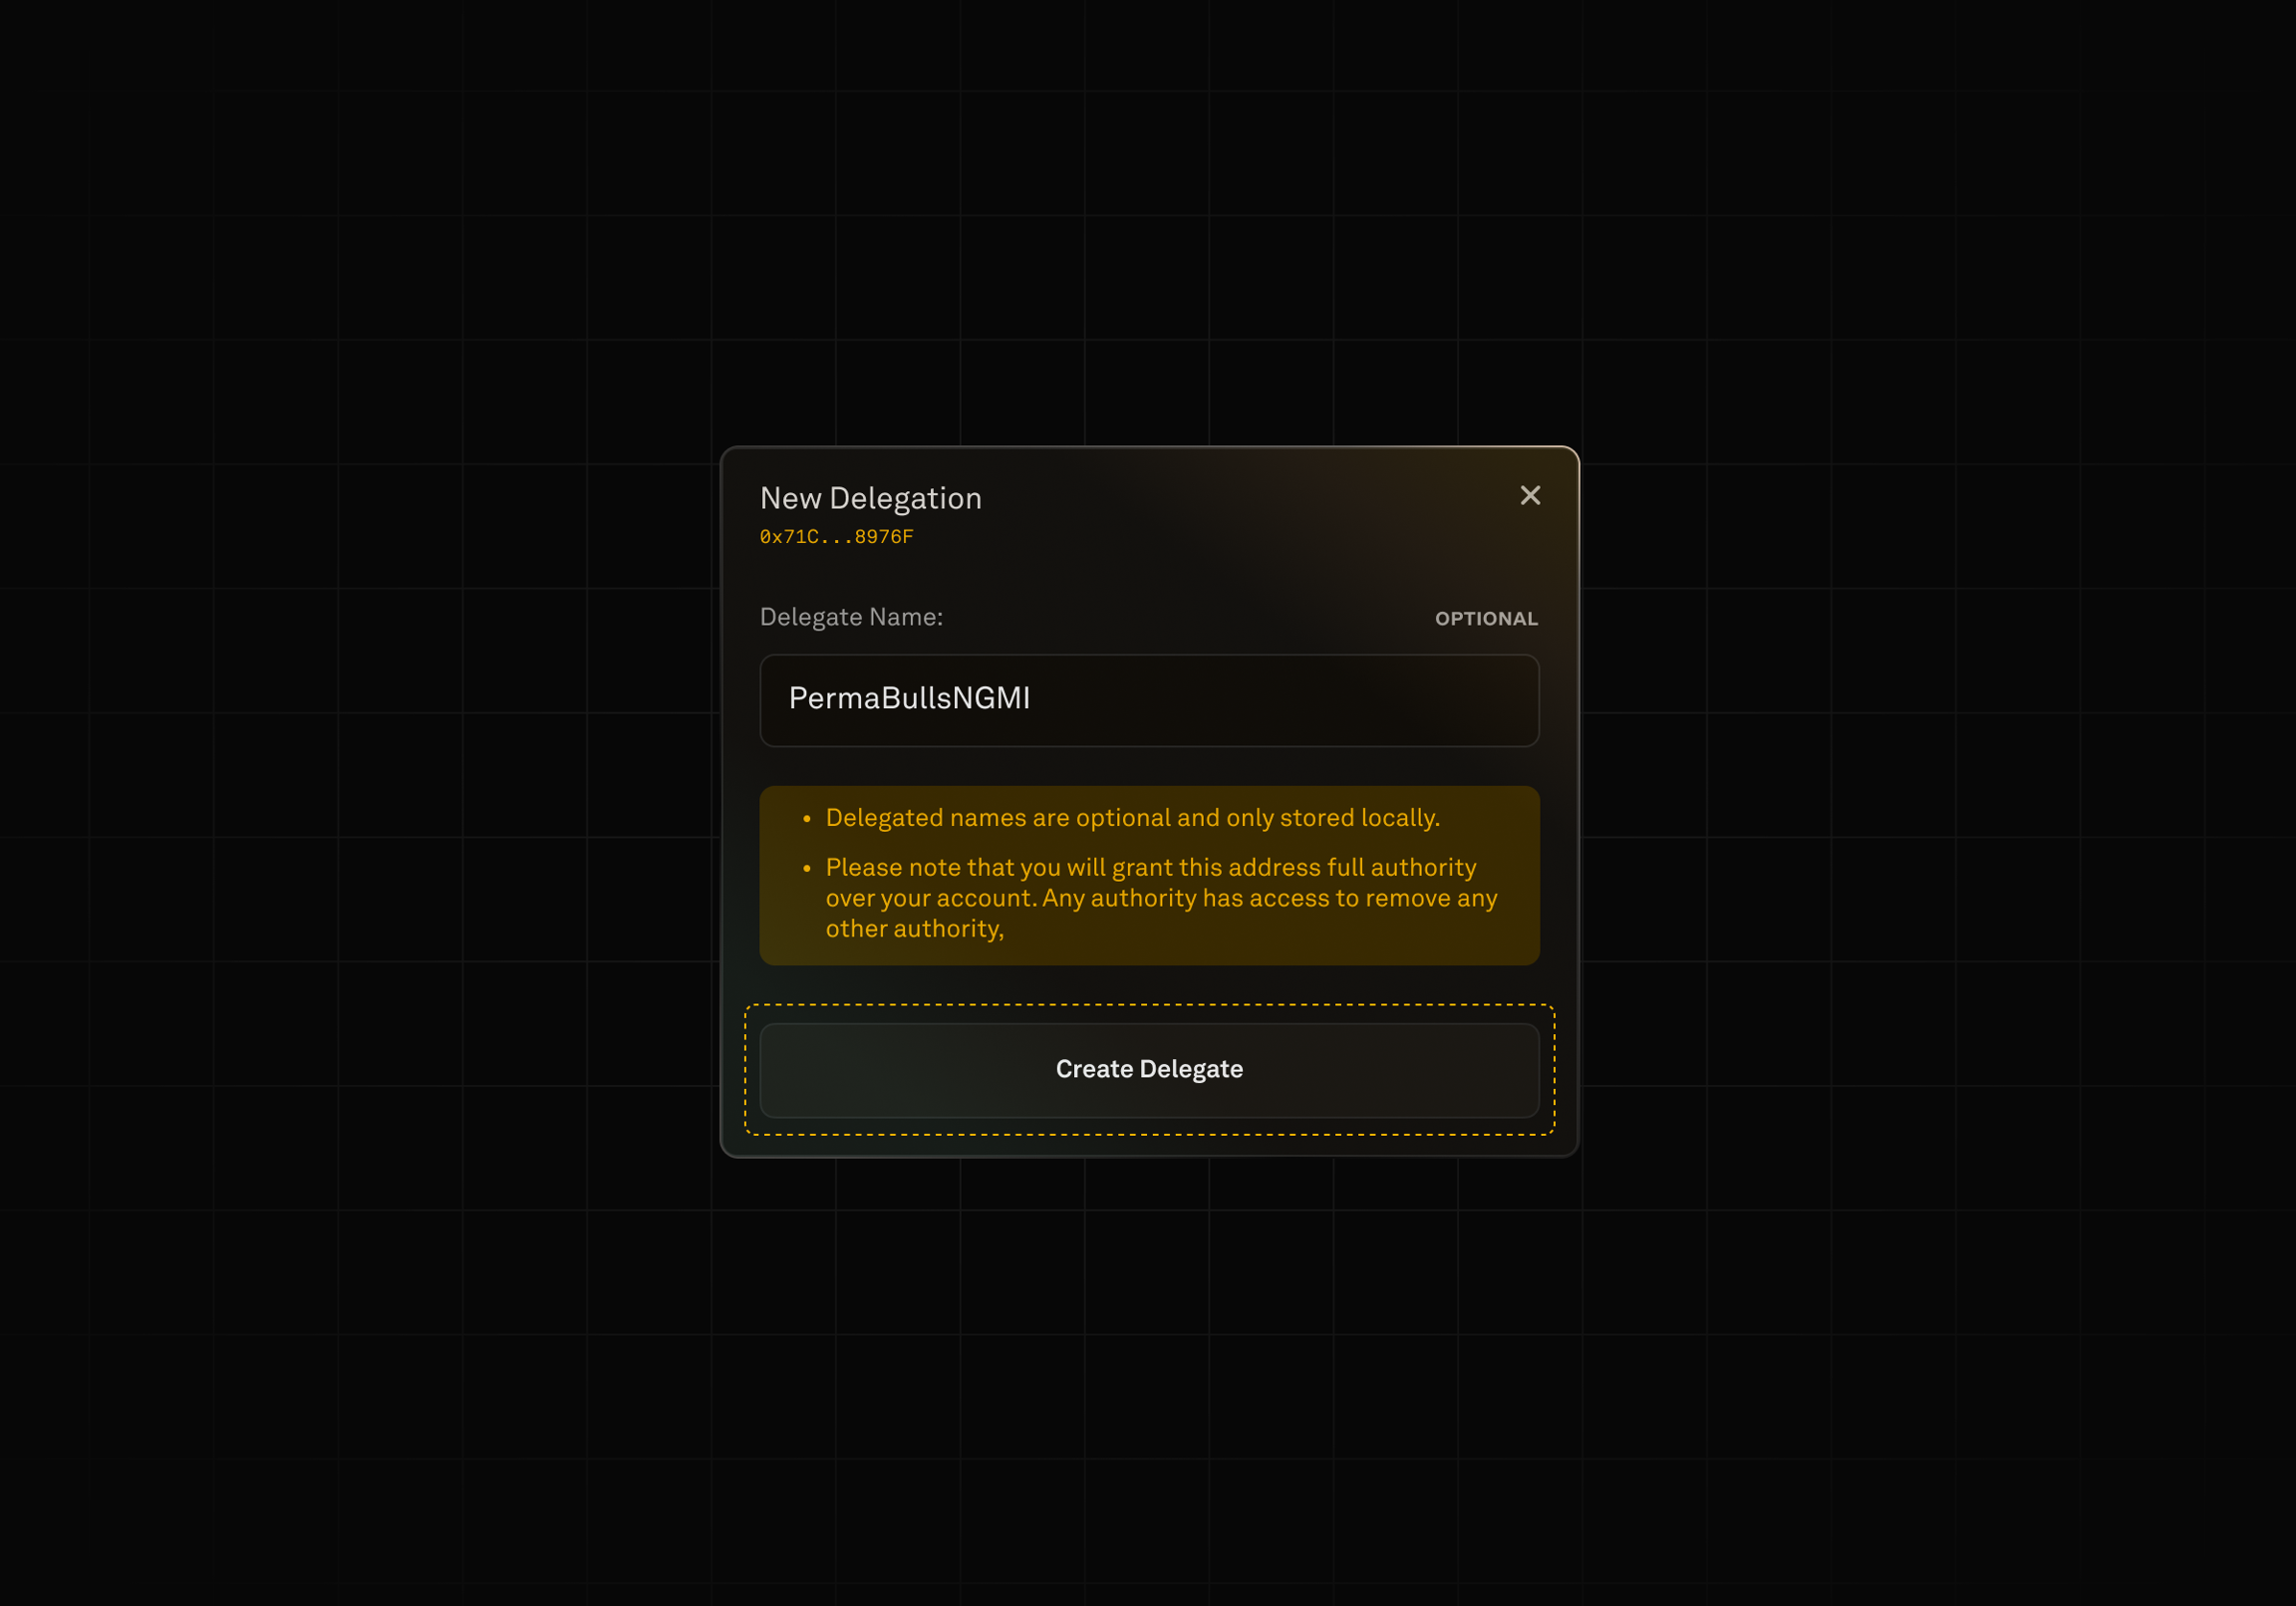
Step 2: Assigning a nickname. The last step in creating a new delegate is to attach a nickname for personal references.
Pro Tip: Custom names are stored in local browser storage, thus will be cleared if users reset their browser cache

Step 3: Complete. Once these steps are complete, you'll see the newly assigned delegate within the "Delegated To" tab in the delegation modal.

Removing a Delegate:
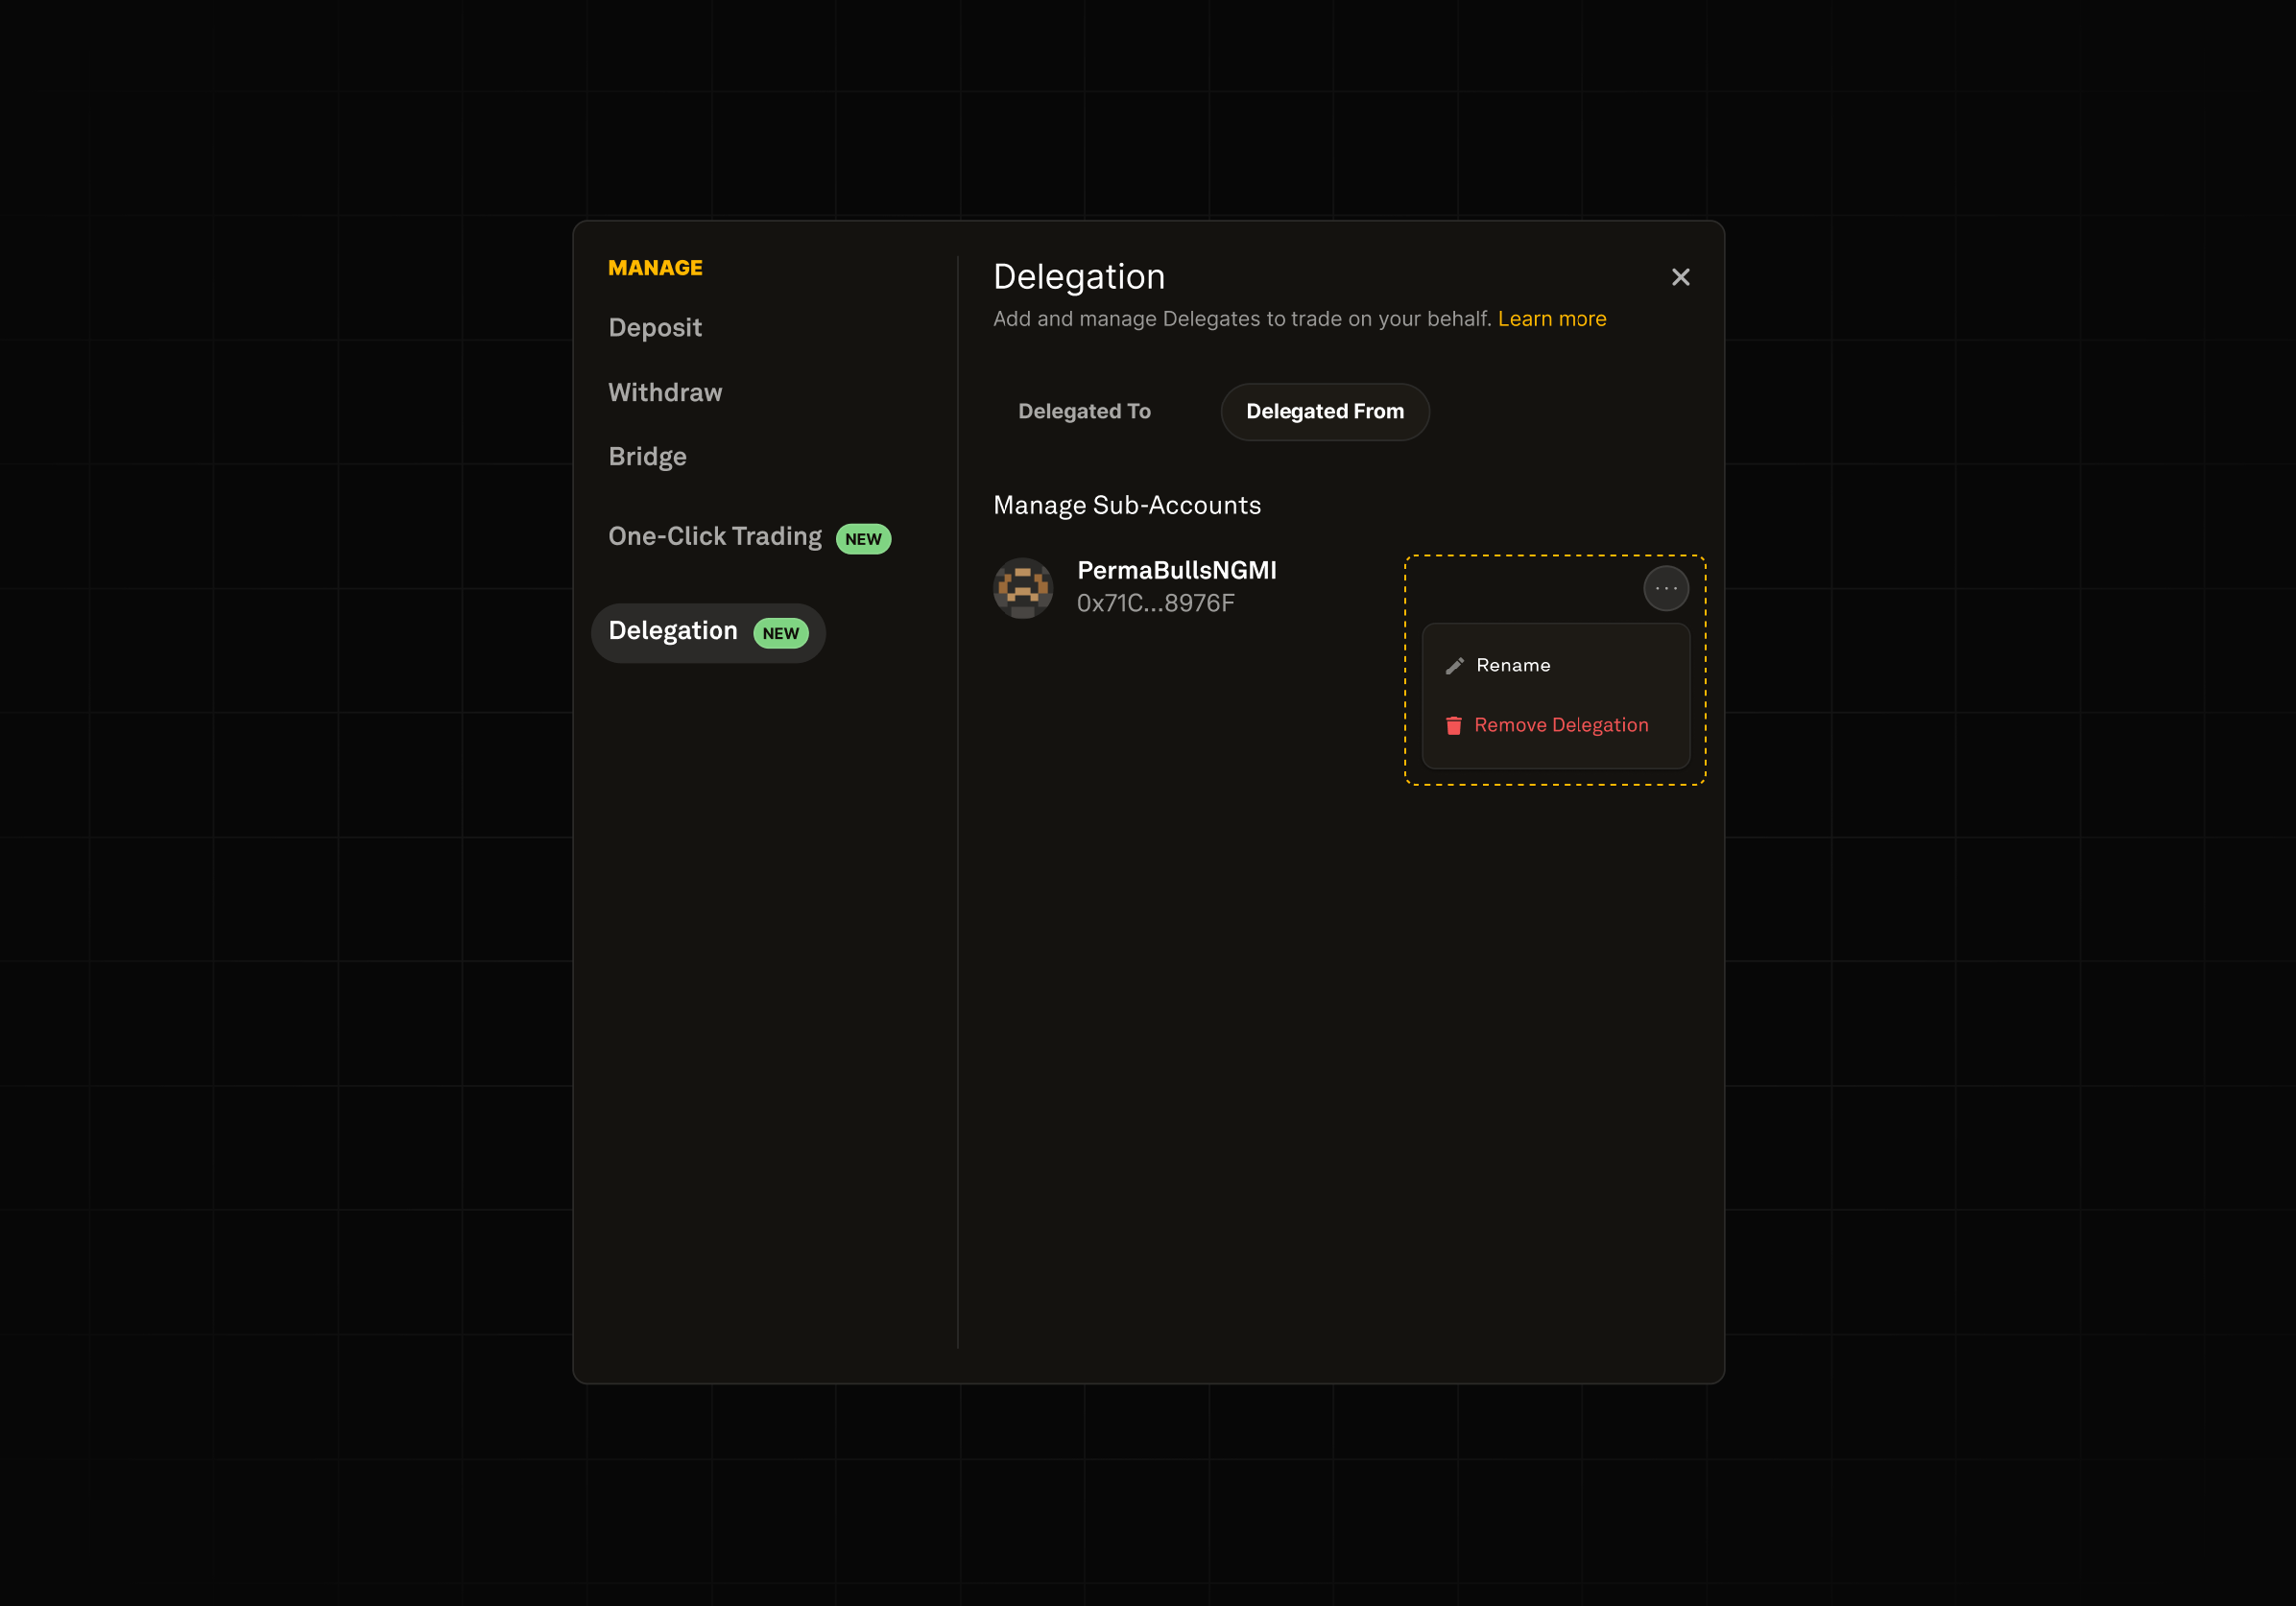
Removing a delegate is a painless task. Smart margin account owners can remove delegated access rights at a moment's notice. This can be completed by visiting the delegation setting module and finding the wallet address that needs to be removed. Once located the removal option can be found under the three dots.

Renaming Delegates:
Did you make a mistake naming your delegate? Renaming can be accessed under the same options tab traders use to remove/delete existing delegates.
Last updated